Table of Contents
HelpDesk+ Account Settings
The Account Settings control what the bot is able to do and how it responds in Slack. The changes you make here are reflected across the entire workspace.
You can limit access to users who can make changes to the Account Settings. Learn how here.
General Settings
These settings are designed to allow certain functionality to exist when using HelpDesk+.
Choose Jira Service Desk(s) or Jira Projects
Connect HelpDesk+ to your Jira or Jira Service Management projects or make changes to your existing settings.
What to know
- You can connect to Jira or Jira Service Management projects with HelpDesk+
- You can select one or more projects to connect
- All requests from this project will automatically be available with all fields configured once connected
- You can map request types to channels within Slack
Changing connected project or service desk.

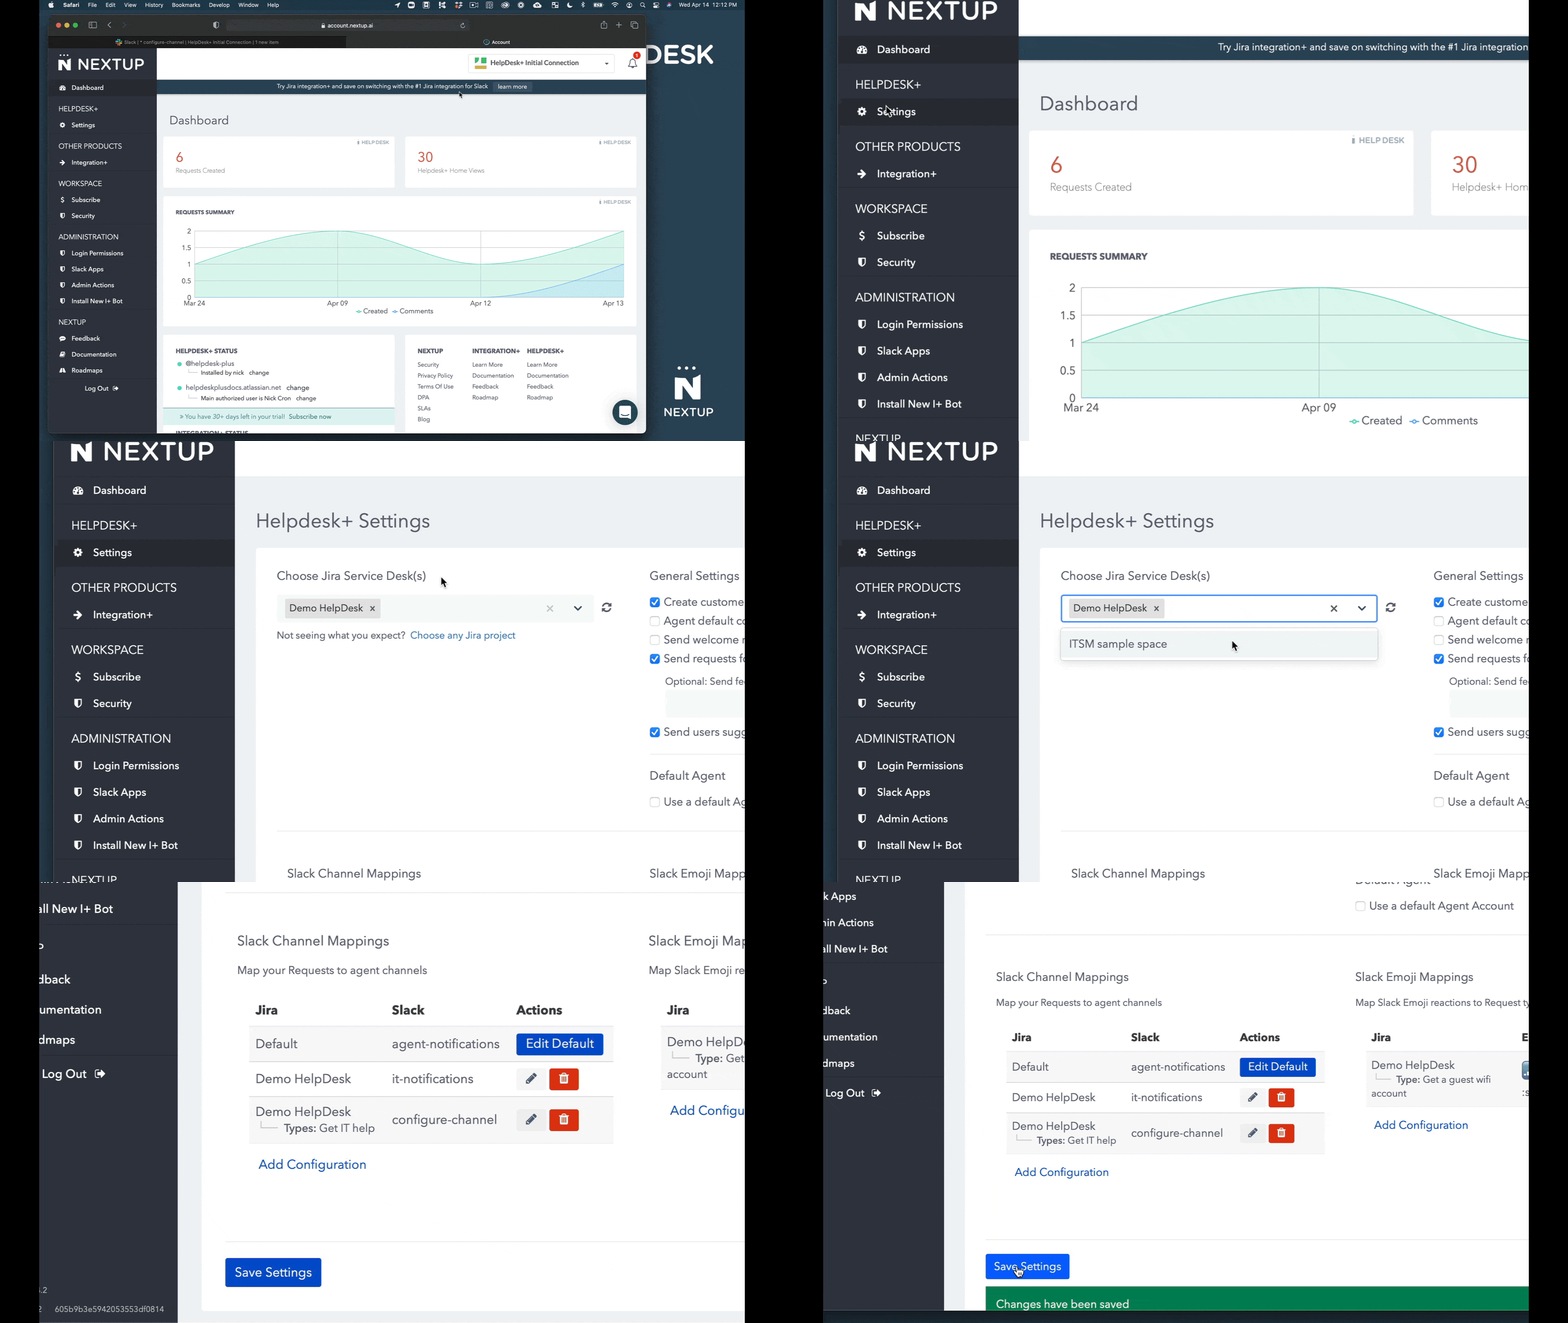
- Login to your account
- Go to settings under HelpDesk+
- Select your service desks under Choose Jira Service Desk(s)
- Save your settings
Configure your Default Agent Channel Mapping
What to know:
- This configuration will send all request types to a specific channel at initial setup. One default alert channel is required.
- You can create more granular agent channels by configuring the bot within a new alerts channel. This can be done in the Account portal or by adding the bot to a channel within Slack.
- Support channels and alerts channels are different and should be kept separate. Learn more about the different channel types and best practices here.
- If you have any questions we're happy to assist with the initial setup. You can book time with our team for setup support!
Configuring your Default Agent Channel

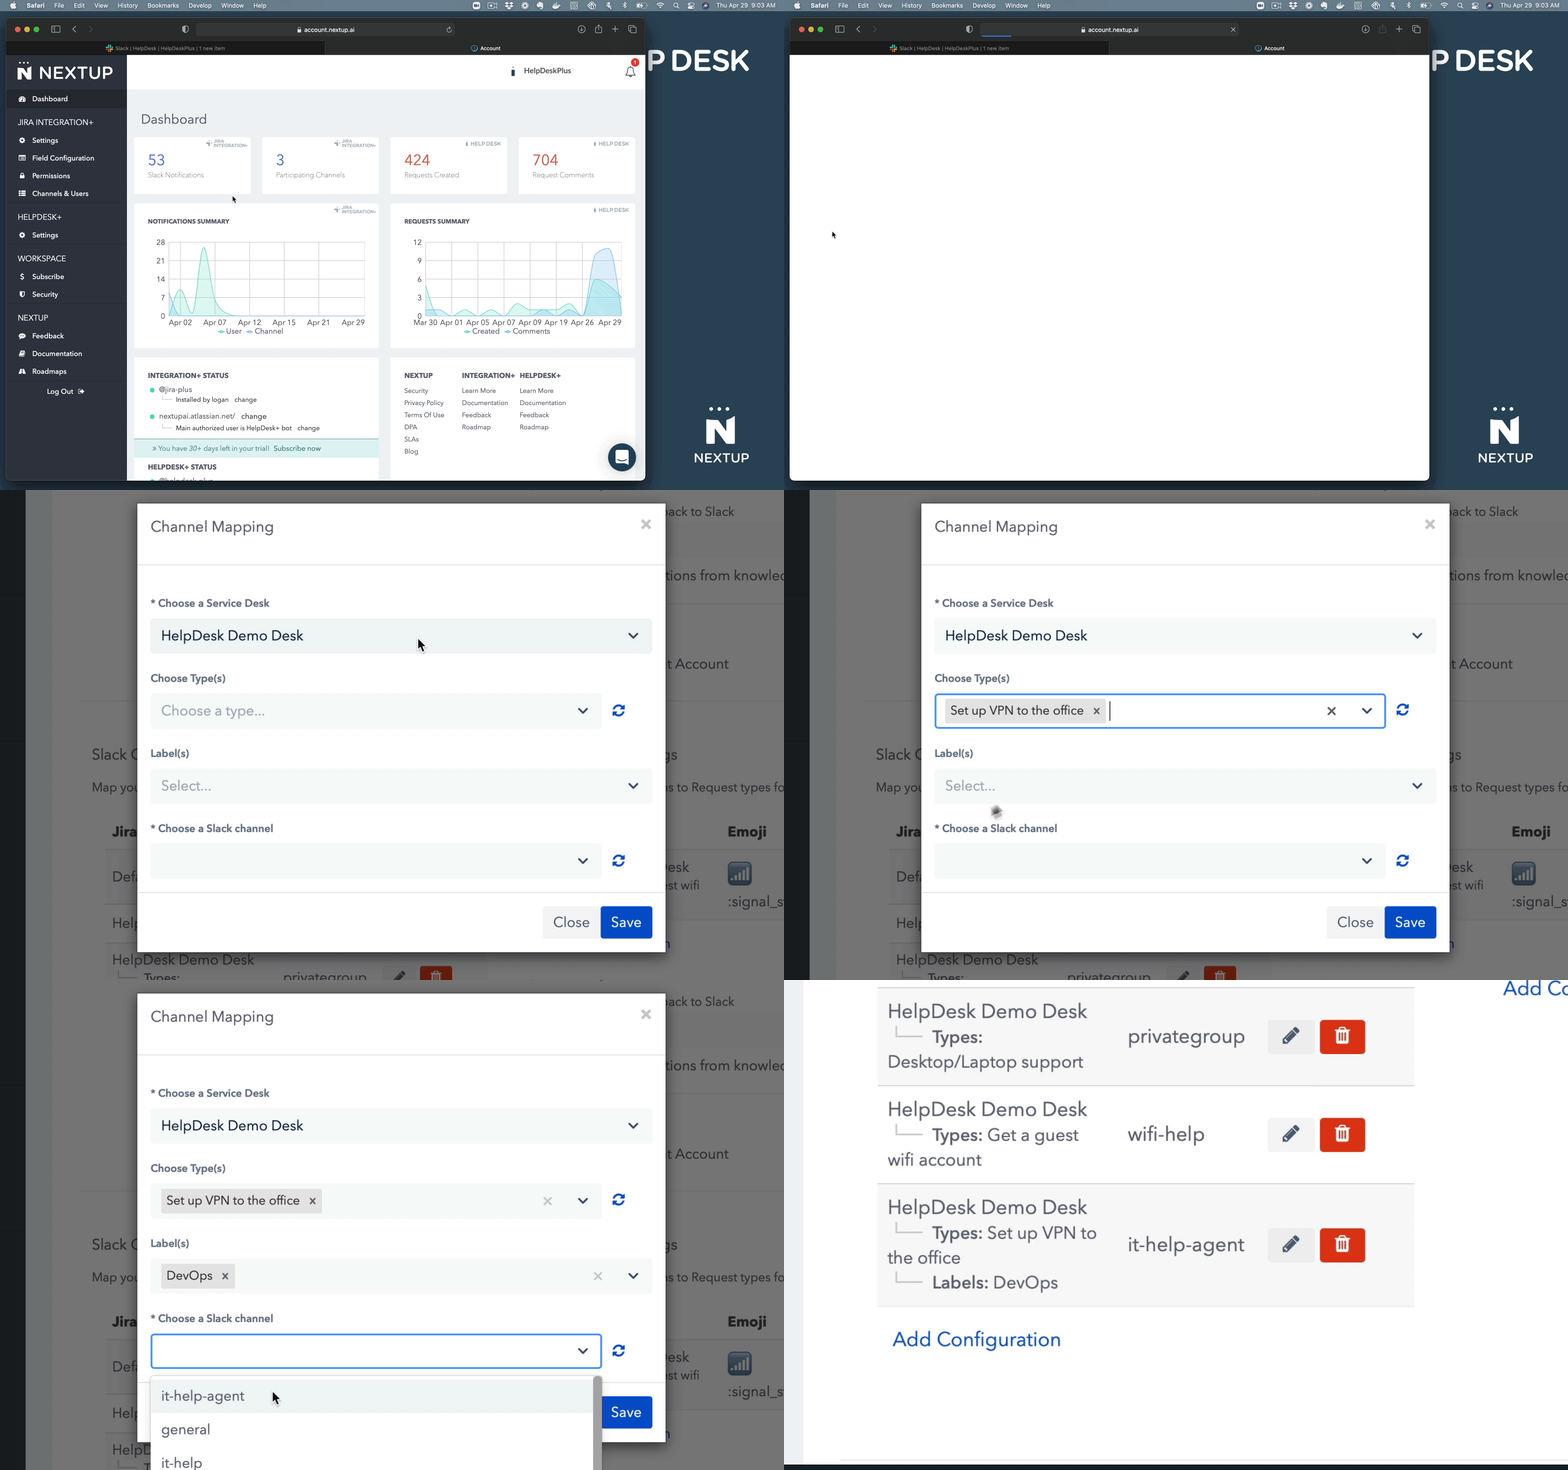
- Navigate to your HelpDesk+ bot settings in the Nextup.ai account portal
- Scroll to the bottom left of the page to manage your Slack channel mappings
- Click "Edit Default" to set your base default agent alerts channel
- Click "Add Configuration" to setup a new channel mapping
- Next, choose your service desk
- Then choose your ticket type. Note, you can select one or multiple types that would route to that channel
- Optionally, select Jira labels that would also route requests to specific channels
- Lastly, select the Slack channel that request alerts should be sent to
