Admin Set-up and Global Configurations
Admin Connection
Admin Account Configurations
Administrator Access Permissions
HelpDesk+ Account Settings
Configuring knowledge-base integrations
Configure Jira Create Fields in Slack
Customer Satisfaction Feedback (CSAT) in Slack
Admin Account Overview
Implementation Planning
How to use
Personal Settings
Connecting your Jira and Slack accounts
Creating a support request
Auto resolve common issues
Public vs private threads
Approval Routing
Knowledge-base Ticket Deferment
Channel Settings
Support Channel Settings
Configuring Support Channels
Automatically create a request for each message
Automatically remind users to create requests
Welcoming users to support channels
Off Hours Support
Agent Channel Settings
Updating issues / transitions / resolution
Additional Features
Create a new request
Mapping Emojis in channels for quick create
Configure mapping between request types and channels
Custom Auto Responses
Enable Canned Responses
Emoji Request Status Configuration
Auto Create
Configuring Shared Channels
Managing Unsupported Plugins by Blocking Issue Creation
Auto Response
Slash Commands - /helpdesk
Agent quick-start
Hosting
Billing
Security
FAQ
Can I Schedule a Demo?
Understand user types
Add to channels
Channel types
Adding to channel
Atlassian Marketplace Billing
How to connect if Jira is behind a firewall
What is the Nextup/HelpDesk+ static IP address
How do I report on the number of issues created from Slack?
Webhooks
How to find your bot ID?
How to resolve a SSL certificate issue
How do I change the name of the HelpDesk+ bot?
Understanding Jira user/agent permissions
Is my data secure and protected?
What ticketing systems are supported?
Support
Table of Contents
- All Categories
- How to use
- Channel Settings
- Support Channel Settings
- Configuring Support Channels
Configuring Support Channels
 Updated
by Nick Cron
Configuring the channels where you support users is a critical part of getting the most out of Helpdesk+
Training Video
Watch this video to learn how this feature works and get some tips and tricks.
Adding to channels
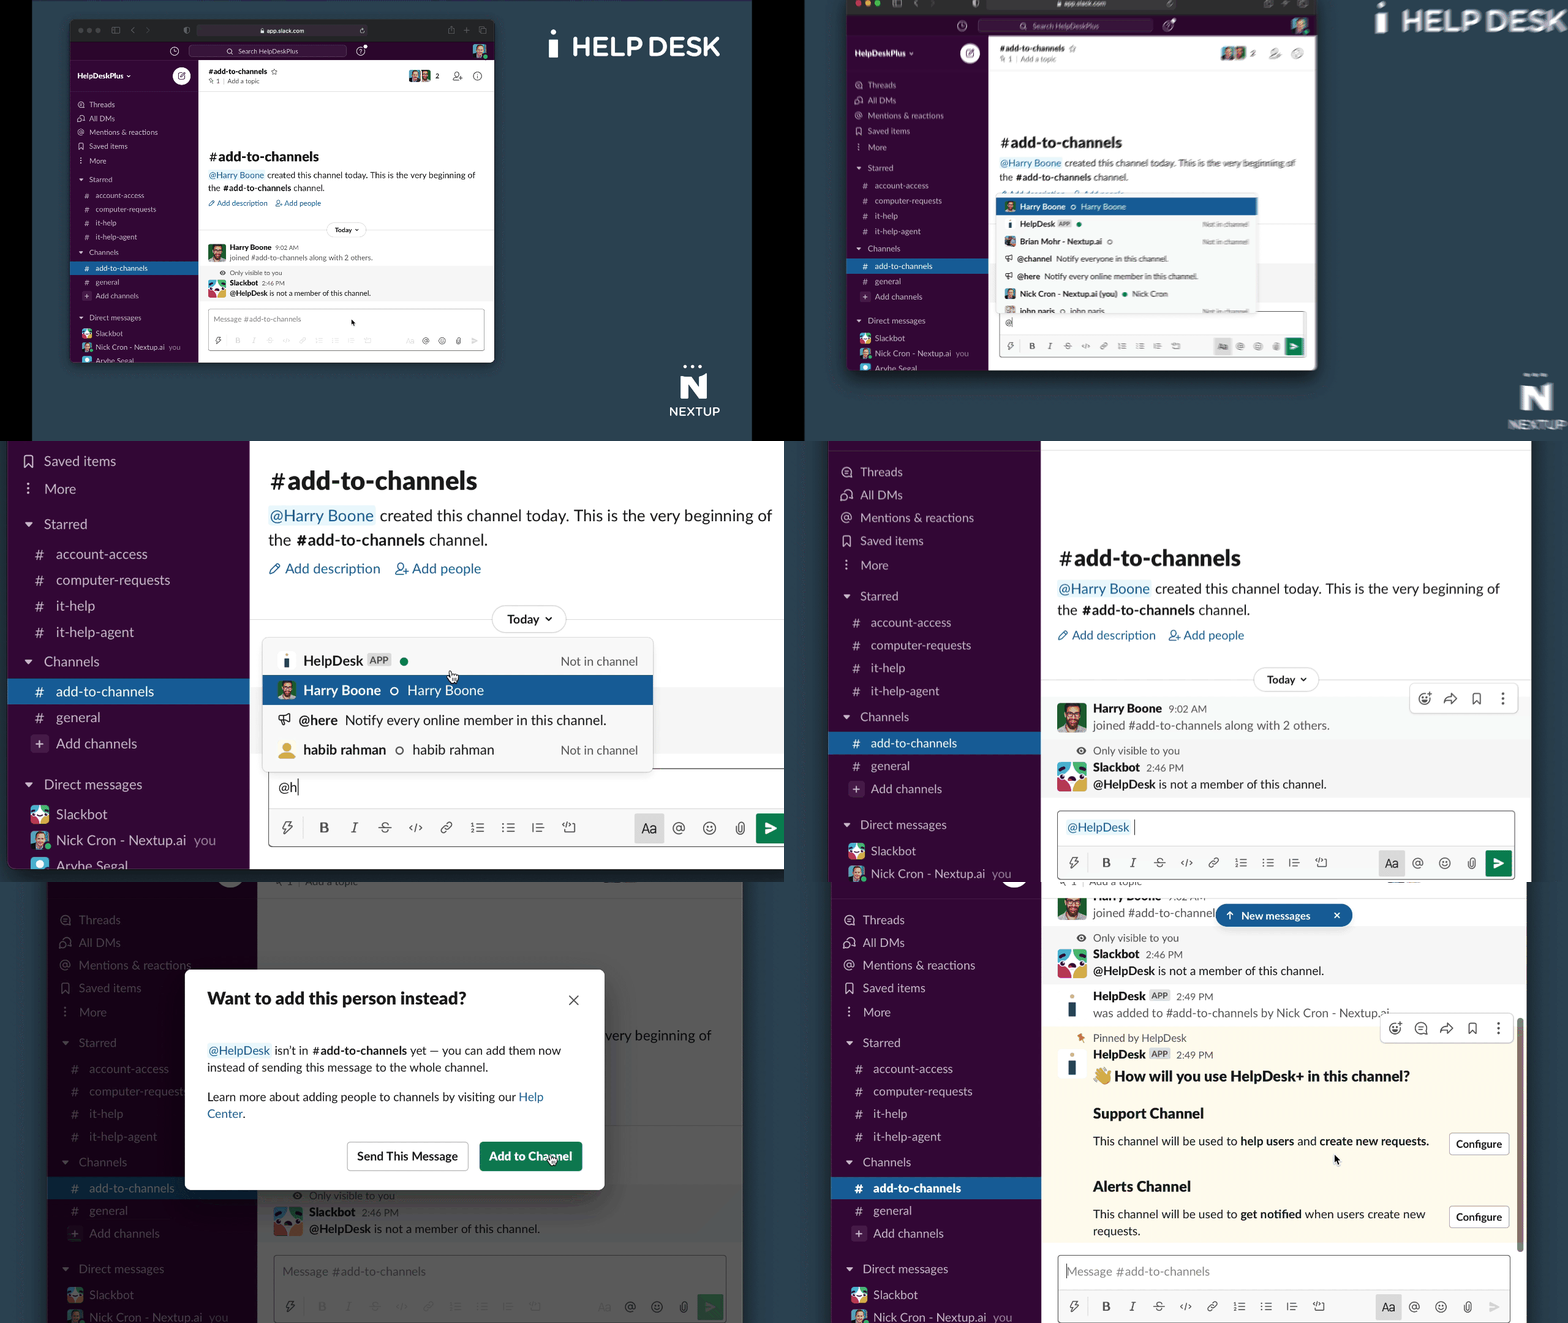
- Navigate to the channel you want to use to support users
- Type @helpdesk
- Hit Enter
- Click the button Add to Channel
Select Support Channel Type
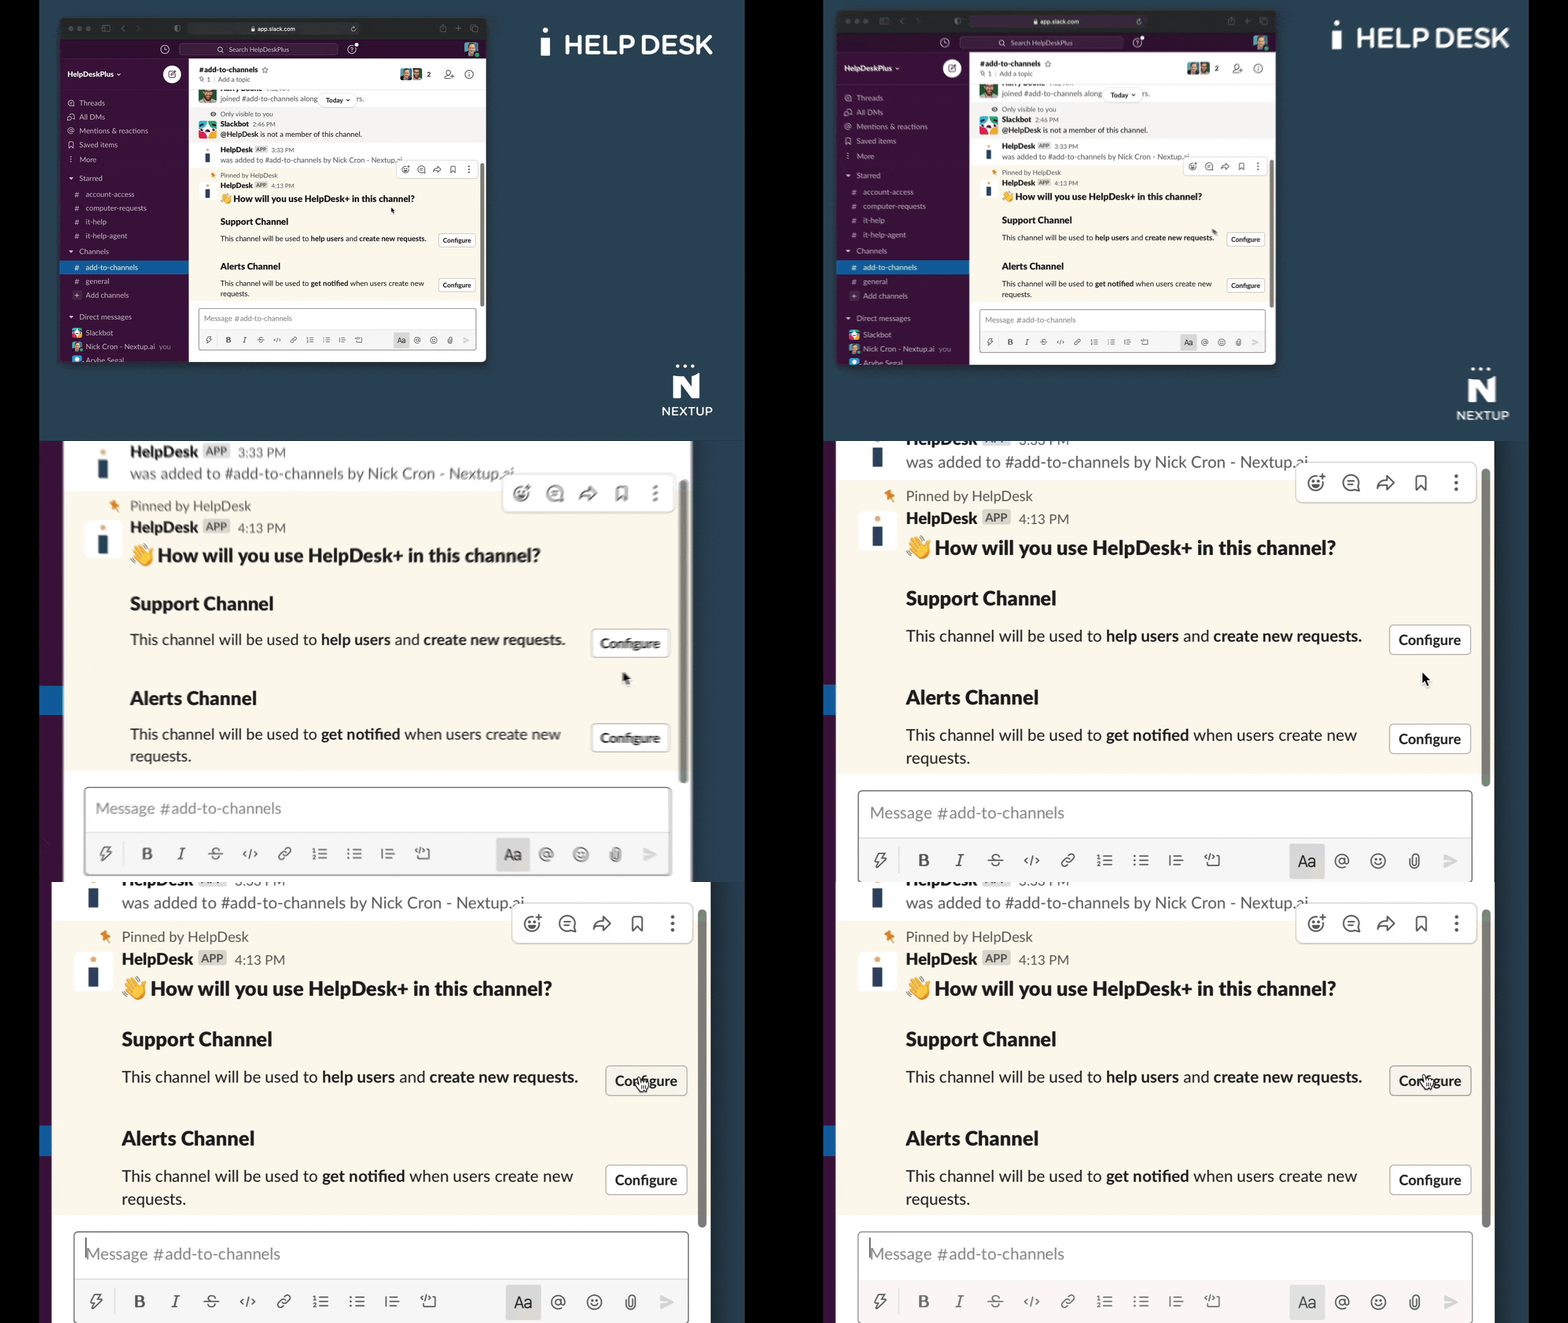
- Locate the message How would you like to use HelpDesk+ in this channel?
- Click the Configure button in the Support Channel section
Configure Request Types
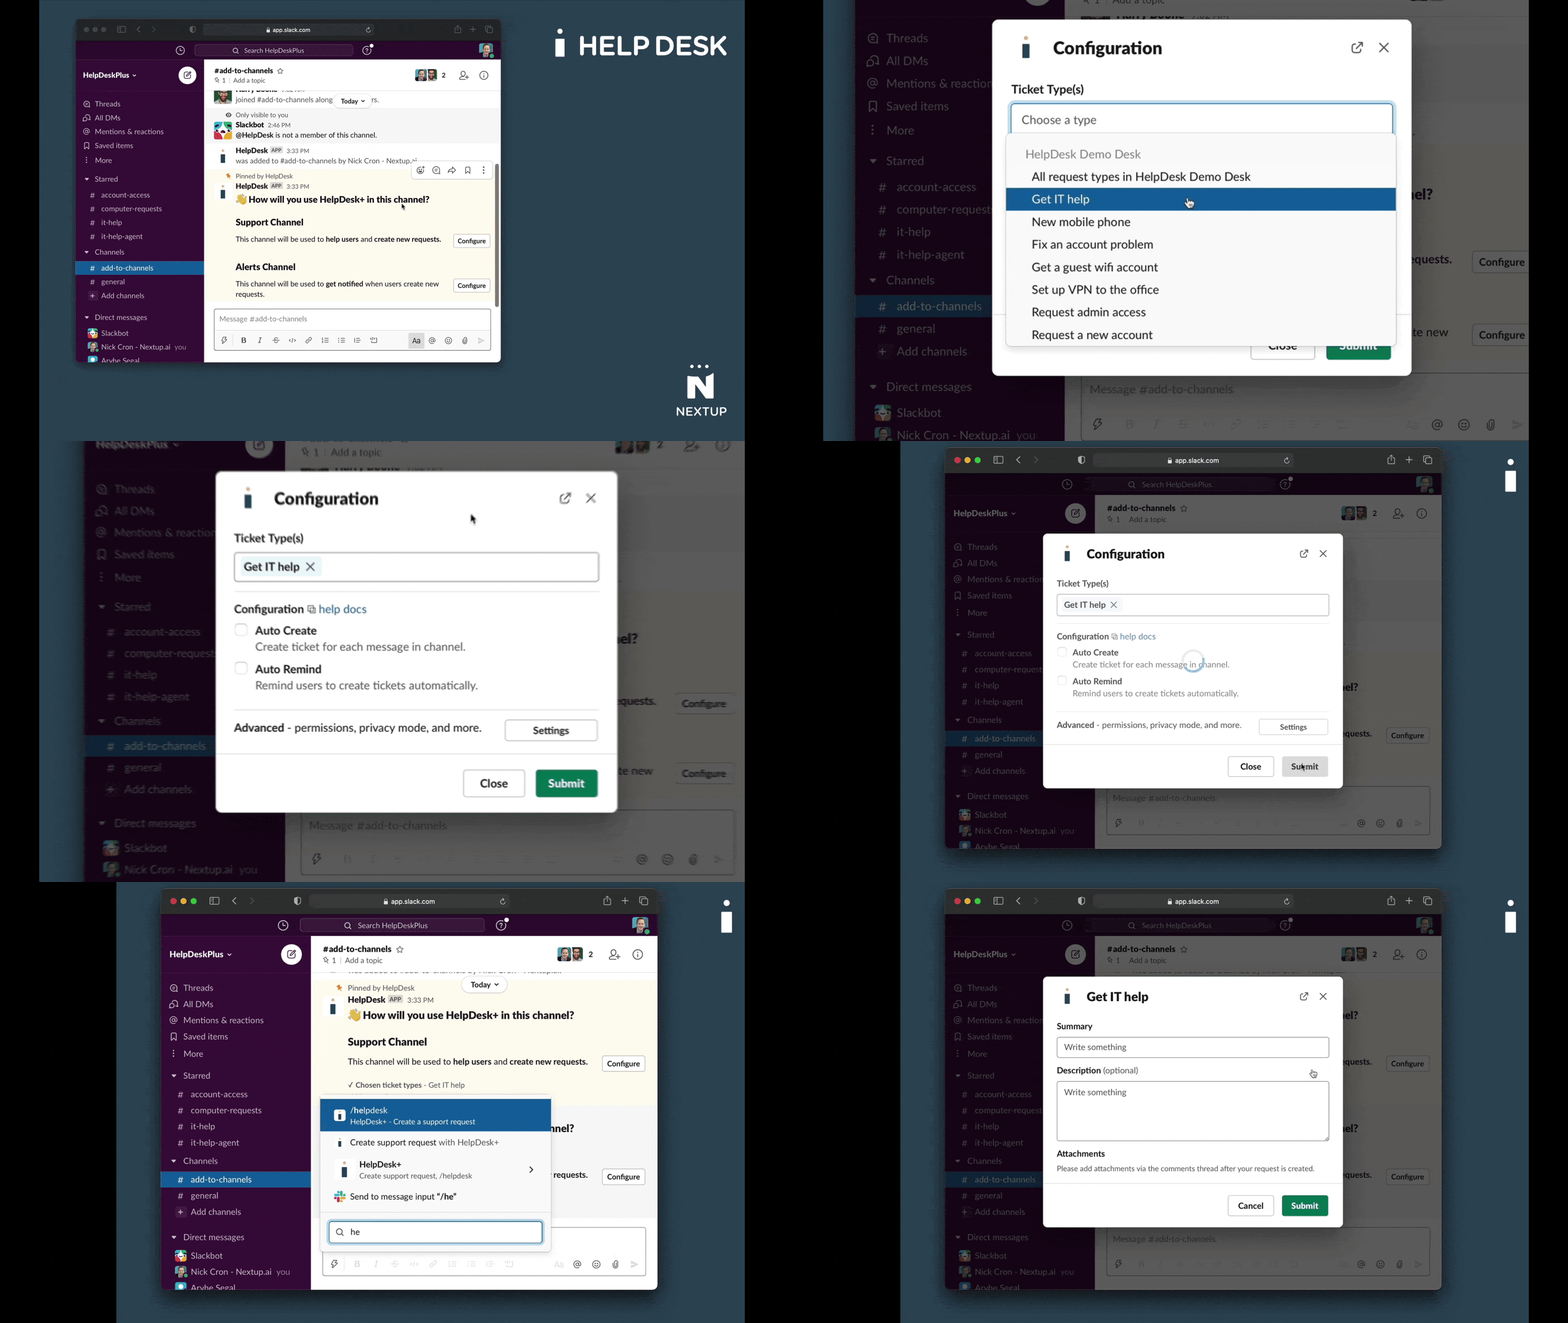
- Type /helpdesk configure
- Choose your ticket types - choose one or more request types or all types from one or more service desks.
- Click Submit
- Test it out by typing /helpdesk
Auto-Remind
Enable auto-remind to remind users automatically to create requests when they write your support team.
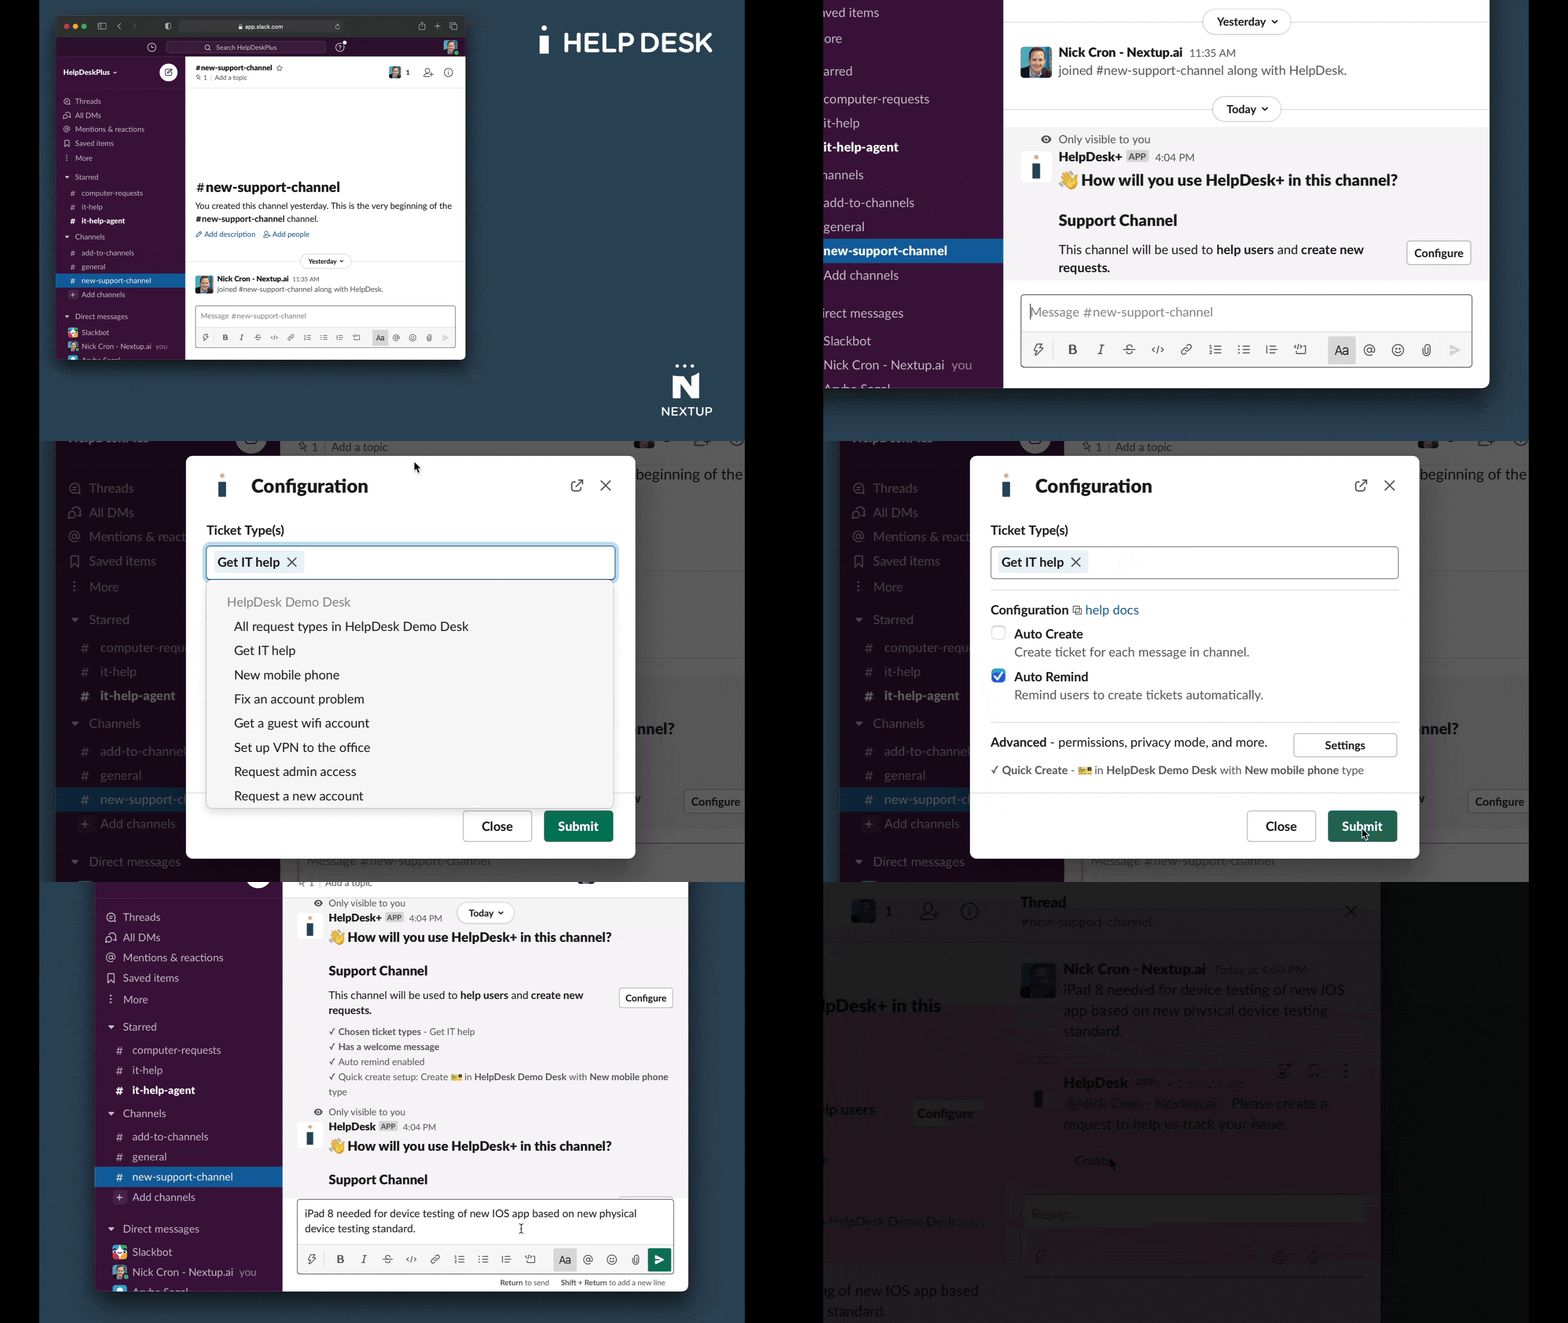
- Type /helpdesk configure
- Click the checkbox next to Auto Create
- Save the settings
Auto-Create
Enable auto-create to automatically create an issue for each message sent to your support channel.
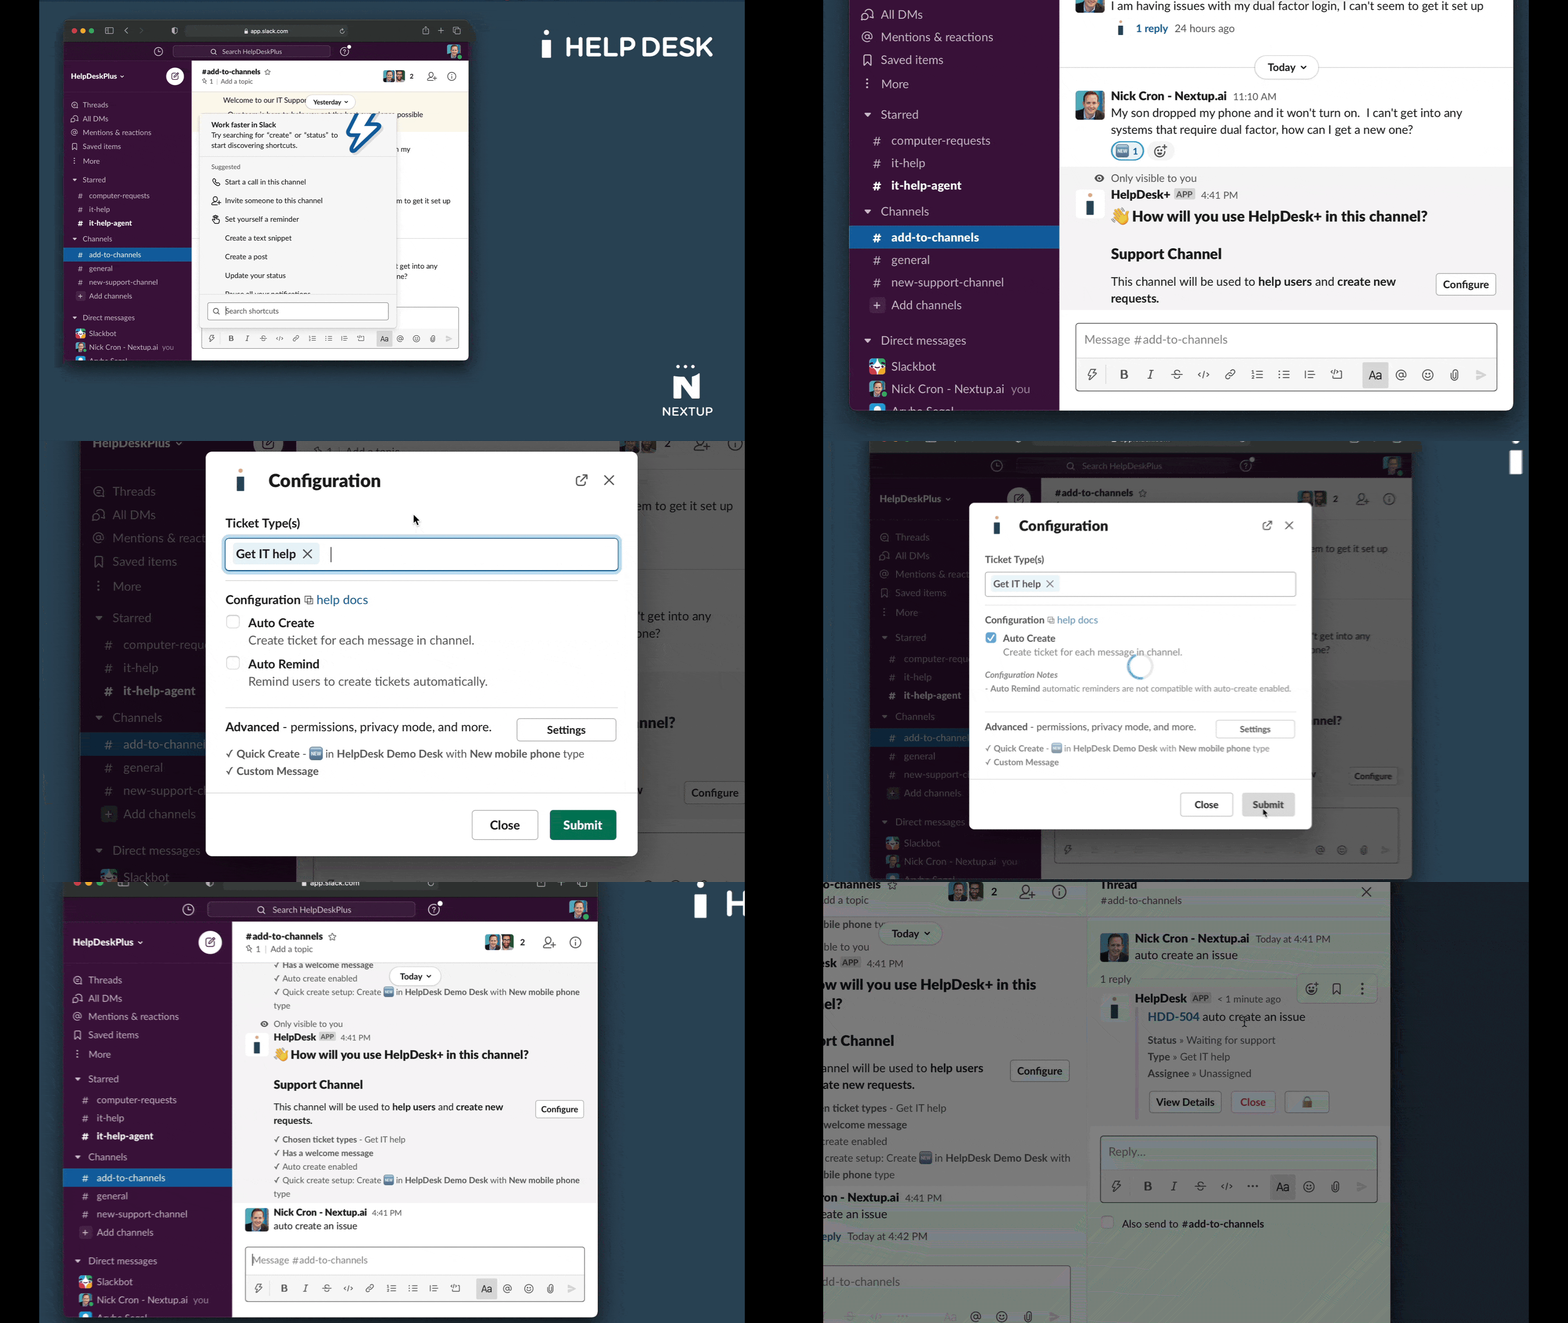
- Type /helpdesk configure
- Choose a single request type
- Click the checkbox next to Auto Create
- Save the settings.
Welcome Message
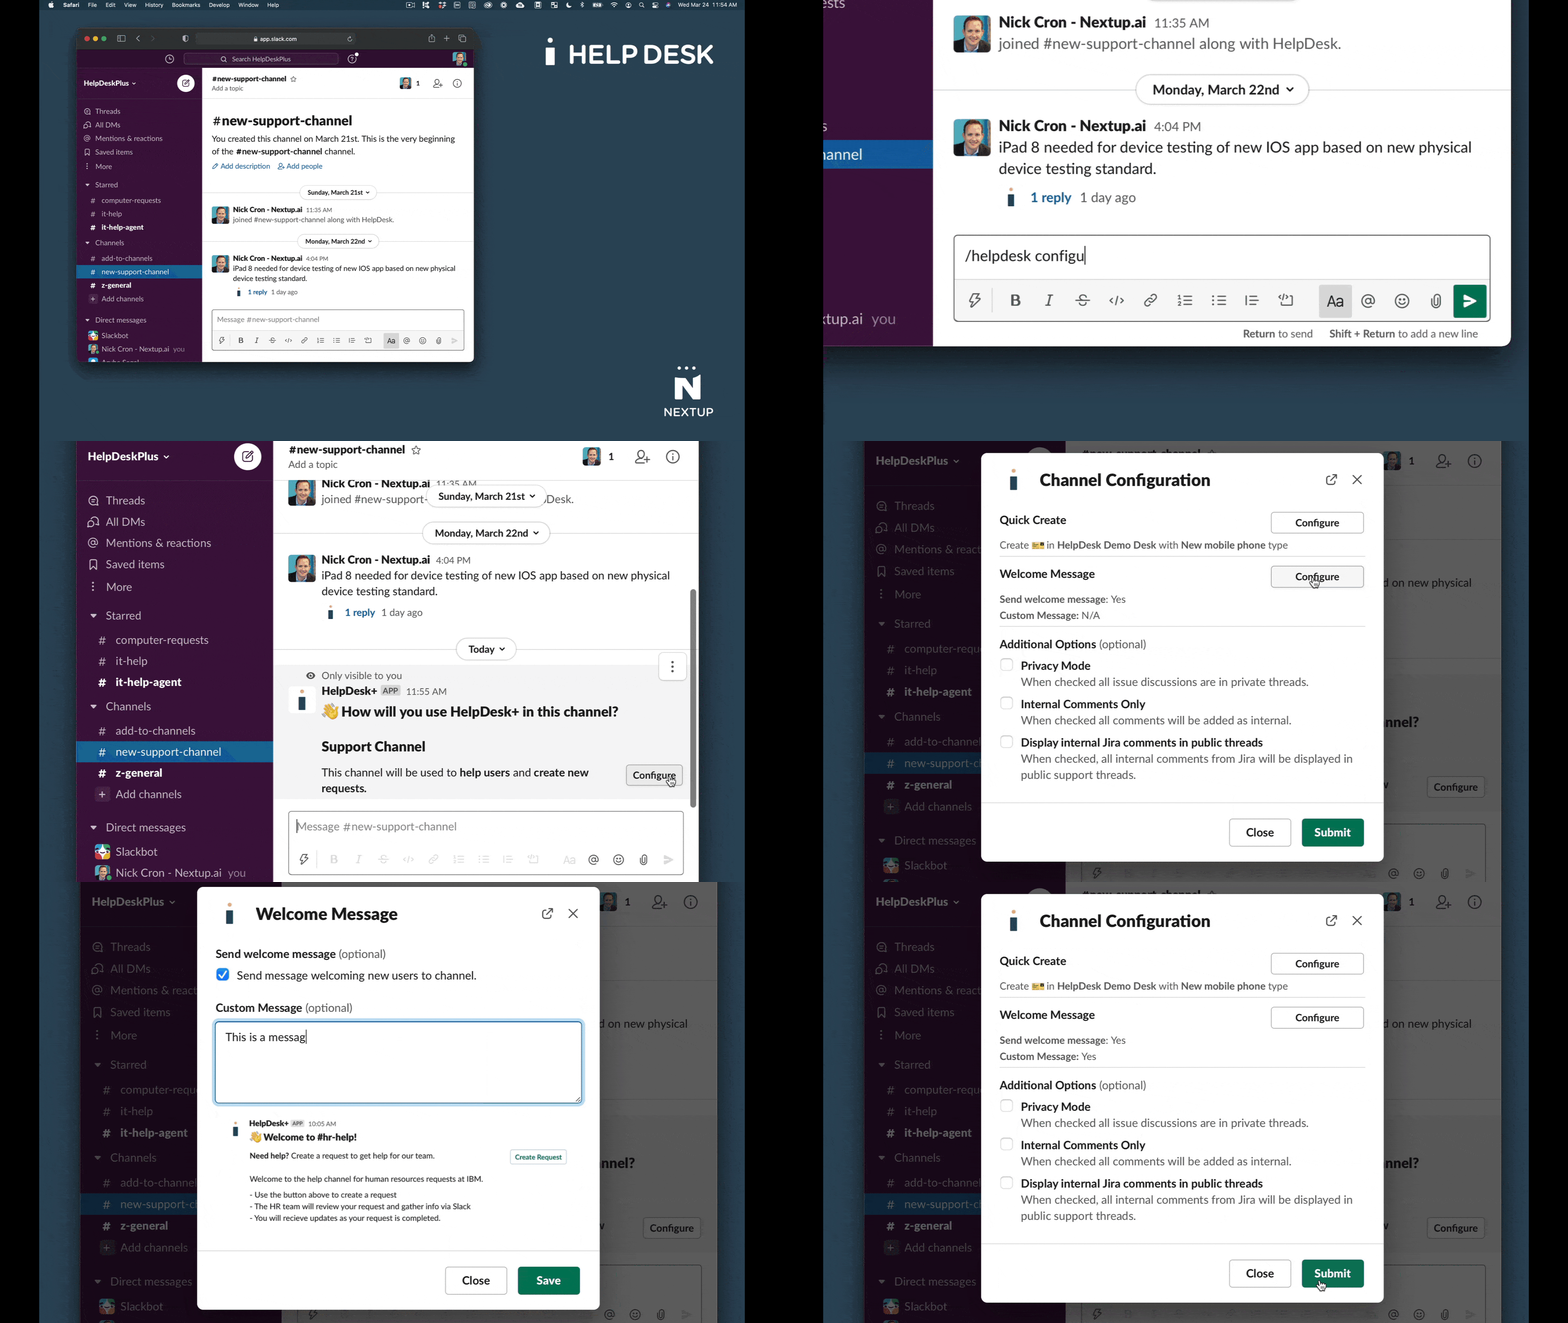
- Type /helpdesk configure
- Click the Settings button under Advanced
- Click the Configure button under the Welcome Message heading
- Add your custom message
- Save the settings.
Quick Create Emoji Mapping
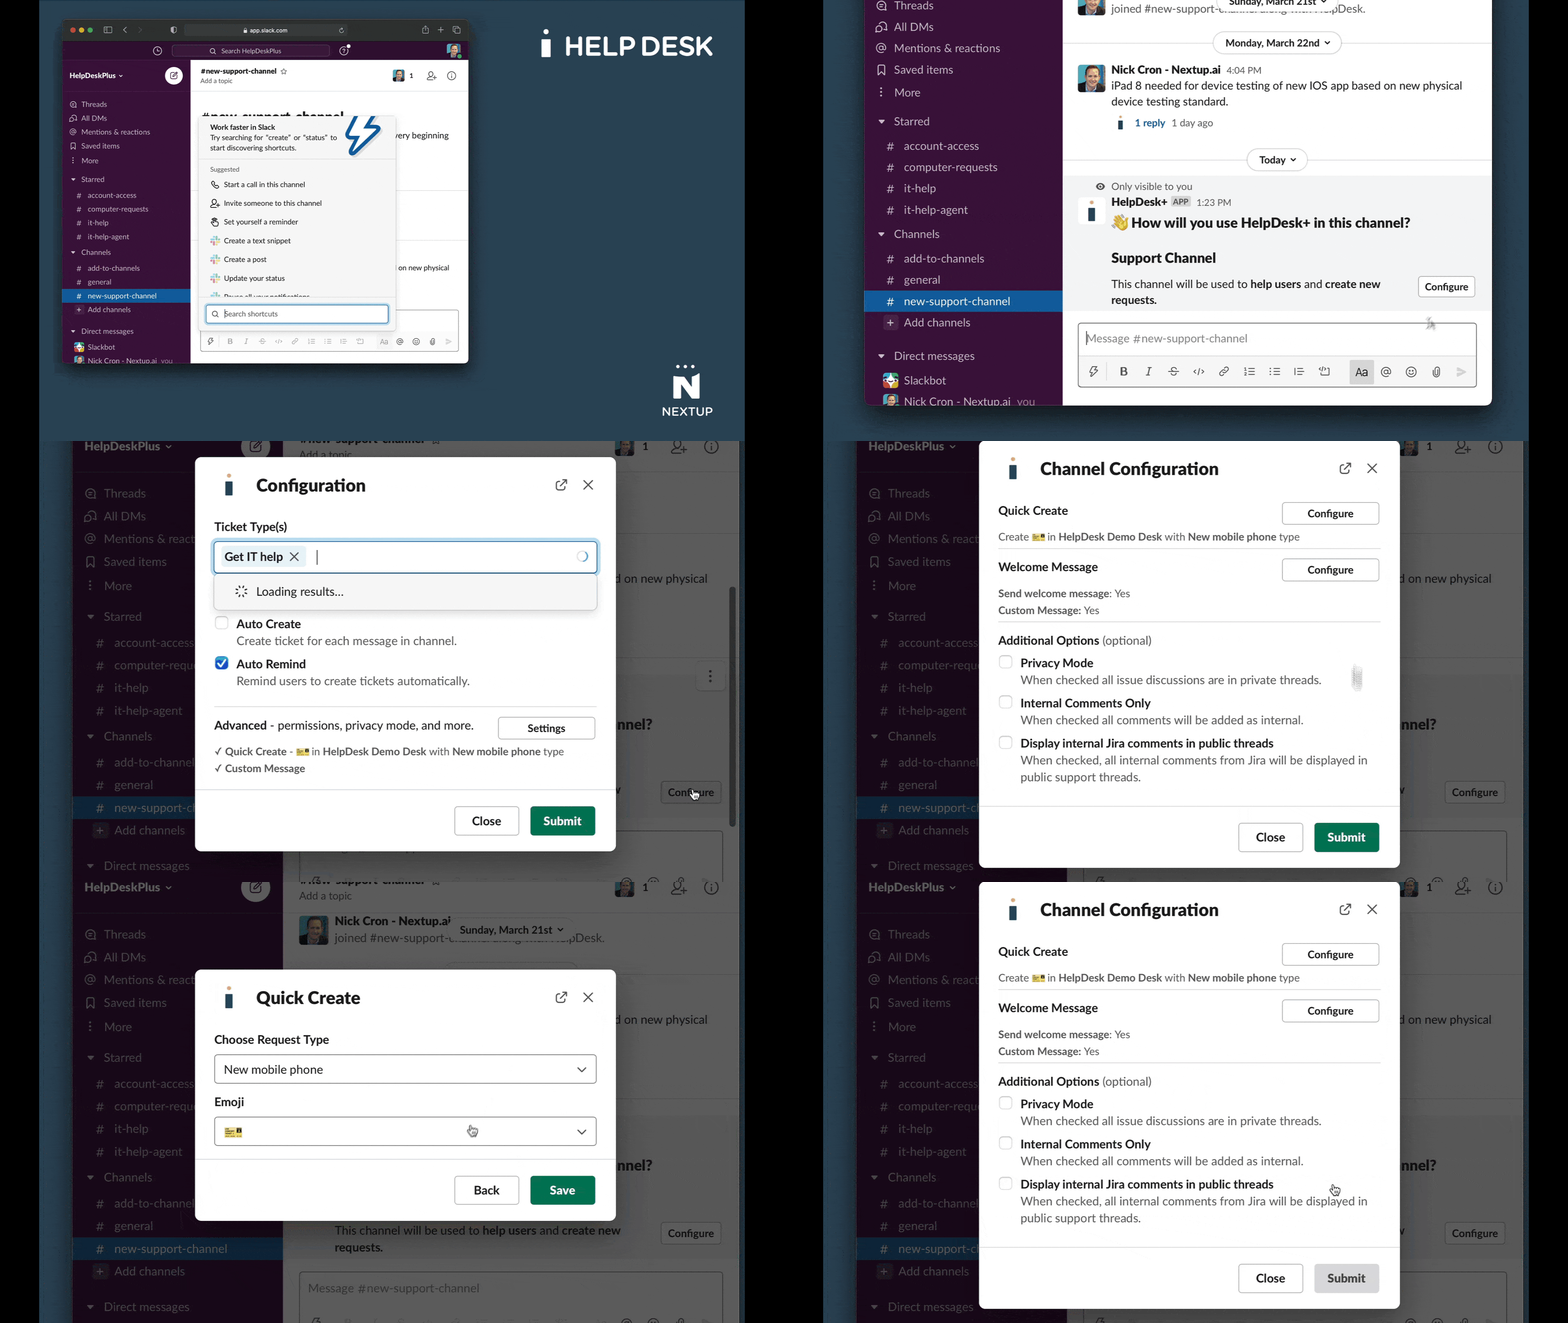
- Type /helpdesk configure
- Click the Settings button under Advanced
- Click the Configure button under the Quick Create heading
- Choose a request type from the dropdown
- Choose an Emoji to map to the request type
- Save the settings.
