Admin Set-up and Global Configurations
Admin Connection
Admin Account Configurations
Administrator Access Permissions
HelpDesk+ Account Settings
Configuring knowledge-base integrations
Configure Jira Create Fields in Slack
Customer Satisfaction Feedback (CSAT) in Slack
Admin Account Overview
Implementation Planning
How to use
Personal Settings
Connecting your Jira and Slack accounts
Creating a support request
Auto resolve common issues
Public vs private threads
Approval Routing
Knowledge-base Ticket Deferment
Channel Settings
Support Channel Settings
Configuring Support Channels
Automatically create a request for each message
Automatically remind users to create requests
Welcoming users to support channels
Off Hours Support
Agent Channel Settings
Updating issues / transitions / resolution
Additional Features
Create a new request
Mapping Emojis in channels for quick create
Configure mapping between request types and channels
Custom Auto Responses
Enable Canned Responses
Emoji Request Status Configuration
Auto Create
Configuring Shared Channels
Managing Unsupported Plugins by Blocking Issue Creation
Auto Response
Slash Commands - /helpdesk
Agent quick-start
Hosting
Billing
Security
FAQ
Can I Schedule a Demo?
Understand user types
Add to channels
Channel types
Adding to channel
Atlassian Marketplace Billing
How to connect if Jira is behind a firewall
What is the Nextup/HelpDesk+ static IP address
How do I report on the number of issues created from Slack?
Webhooks
How to find your bot ID?
How to resolve a SSL certificate issue
How do I change the name of the HelpDesk+ bot?
Understanding Jira user/agent permissions
Is my data secure and protected?
What ticketing systems are supported?
Support
- All Categories
- Admin Set-up and Global Configurations
- Admin Connection
- Connect to Jira
Connect to Jira
![]() Updated
by Brian Mohr
Updated
by Brian Mohr
Connect with JIRA
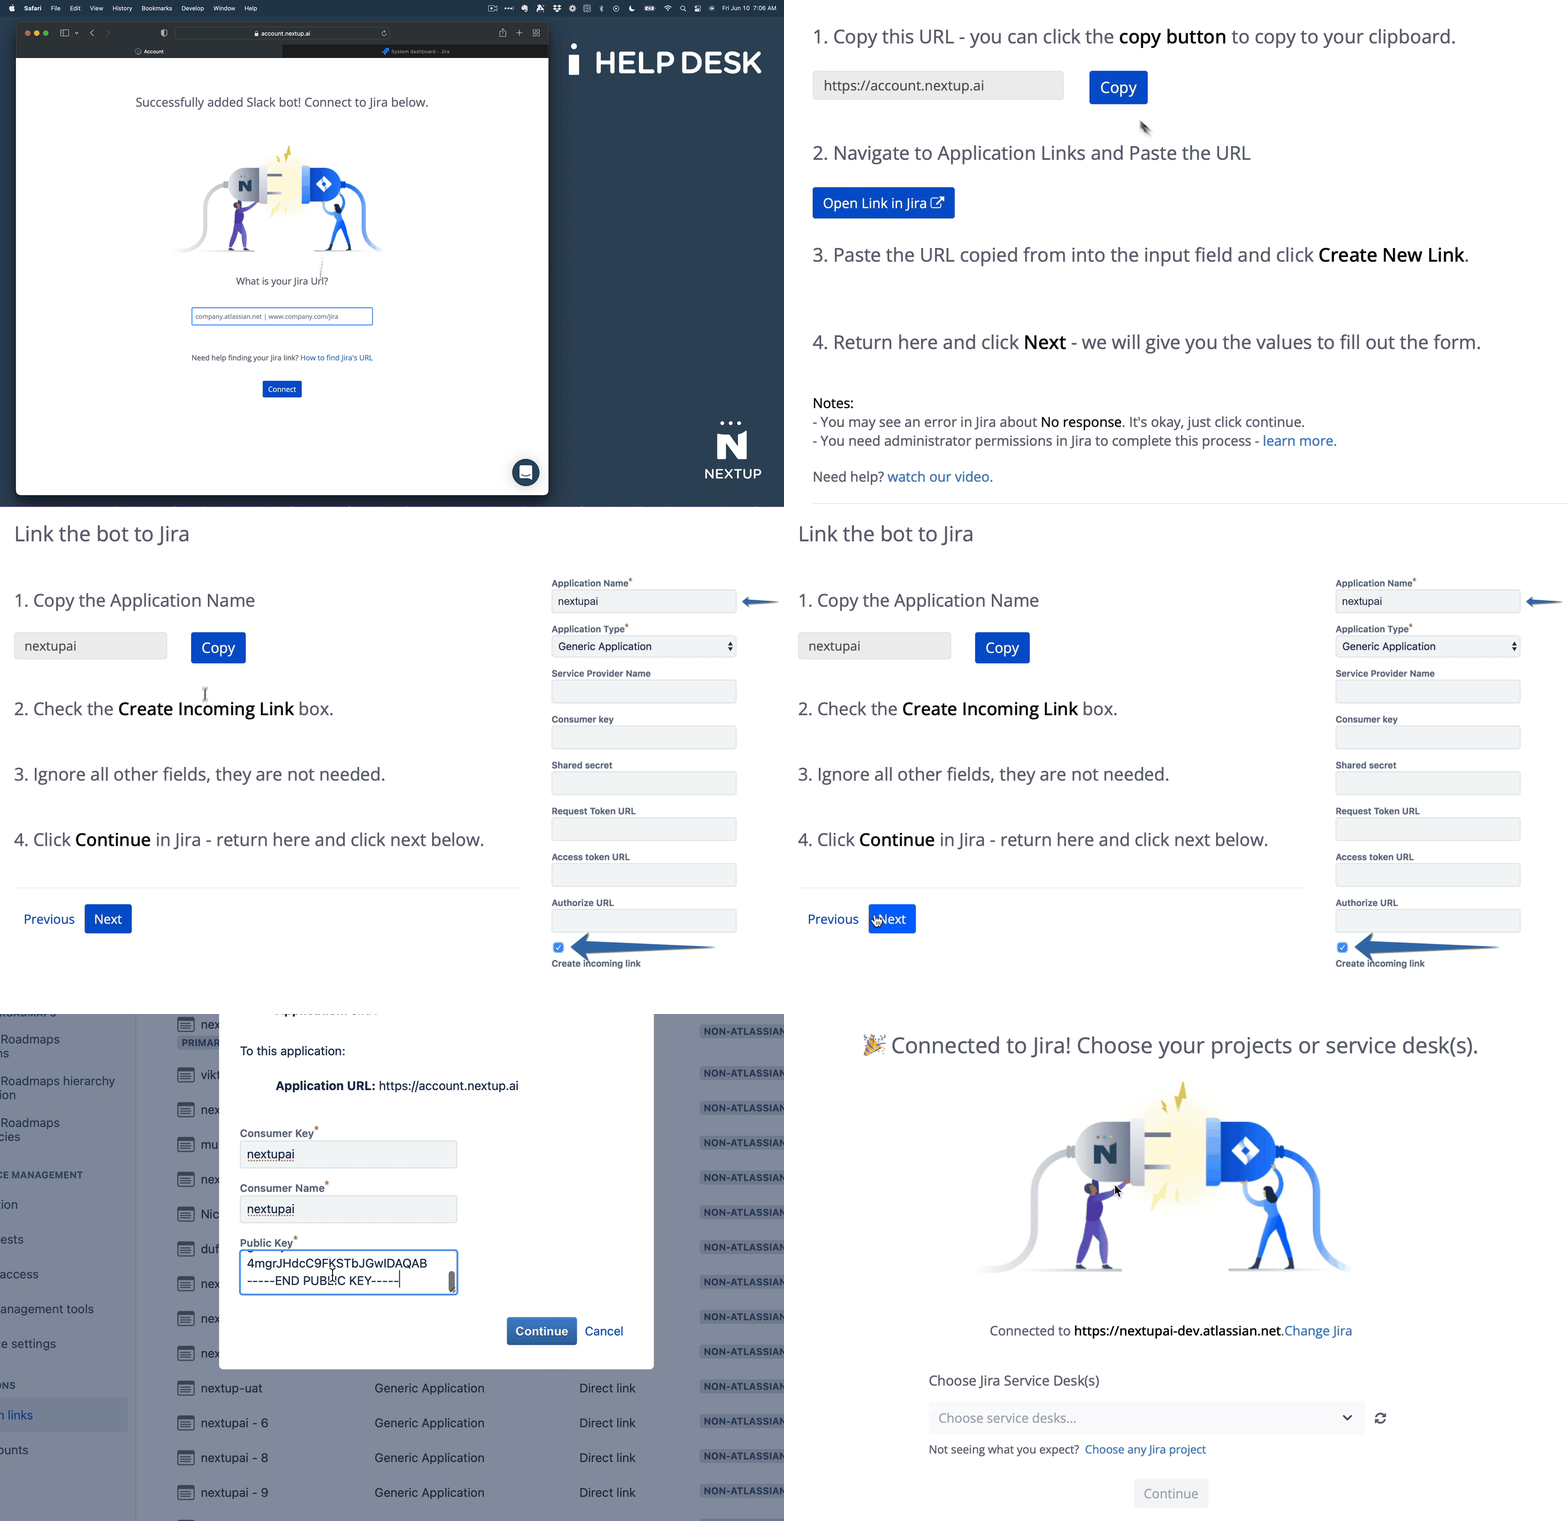
After the connection with Slack is established you will now create an Application Link connection with JIRA. This is JIRAs version of the same process that you likely just completed in Slack. The application will generate dynamic data for your connection and will guide you through the setup process.

- First, enter the full URL/address of your Jira instance.

- Next, allow the HelpDesk+ bot access to your Jira instance.

- Now, follow the on-screen instructions to setup your application link

- MOST IMPORTANT STEP - Save your connection data in the Nextup account portal. This saves your dynamic data and completes the connection.
- Then, select one or more Jira Service Desk (or Jira software) from the drop down control.

- Then, choose your agent notification channel.

